Simone Seagle
Independent Web and Educational Software Developer

Independent Web and Educational Software Developer
Mouse-over or touch/drag to interact with Variations. Or, view fullscreen.
Variations (Progressive Motif) was painted by Paul Klee in 1927. Paul Klee was a contemporary of Wassily Kandinsky who also taught at the Bauhaus school. His works are highly stylized and often colorful and delightful. I love the blocky shapes and all the personality that shines in his work. On a side note, the Met lists the medium as oil and watercolor - so how on earth did he get such fine lines? I had no idea you could do that with oil paint.
This piece gets its name from the slight variations on a grid that wind up creating a subtle picture. Usually I am drawn toward more vibrant colors, but this reminds me of sliding tile puzzles, and I knew it would be a blast to animate.
Like Kandinsky, a lot of his work really lends itself well to what I do, so you can expect to see me use more of these in the future.
When I took painting classes, one of the best things that my teachers taught me was to embrace the happy accidents, and that came into play more during this piece than it has during any that I've made before.
When you first look at Variations, you see that it's a grid. I thought to myself - man, this would make a great sliding tile puzzle. However, when I went to cut the grid up, I realized that it wouldn't work the way I originally planned because the grid isn't perfect. I had to come up with a new scheme. I made my own array of points that represent the centers of each tile, and then used an array of rectangles to create masks for each tile. Therefore, I wound up not really needing to do any Photoshopping at all, other than the background for the whole piece. Every single tile uses a version of the whole image that's simply been scaled down and masked off. Here's the code I used to make the array of rectangles used to make the masks. The ScaledTileCenters is exactly what you would expect - I made an array of the center points of each tile, then scaled them.
    /**
     * Make sure you run the getScaledTileCenters before this!
     * Creates a 2D array of rectangles representing the outlines
     * that will become masks for the tiles
     * @return {[type]} [description]
     */
    function getScaledTileRects() {
        if (scaledTileCenters == null || scaledTileCenters.length < 1) {
            throw "This relies on scaledTileCenters and will not function (lol) without it.";
        }
        var tileRects = [];
        // not sliding the top row
        var lastY = slidingTileStart * scale;
        for (var j = 0; j < 8; j++) {
            var tileRow = [];
            var lastX = 0; // x's start at the left side of the work
            var height = 2* (scaledTileCenters[j][0].y-lastY);
            // the height of all tiles in one row is the same.
            for (var i = 0; i < 9; i++) {
                var centerX = scaledTileCenters[j][i].x;
                //console.log("rect for ", scaledTileCenters[j][i]);
                var width = 2*(centerX - lastX);

                tileRow.push({
                    x: lastX,
                    y: lastY,
                    width: width,
                    height: height,
                });

                lastX += width;
            }
            tileRects.push(tileRow);
            lastY += height;
        }
        return tileRects;
    }
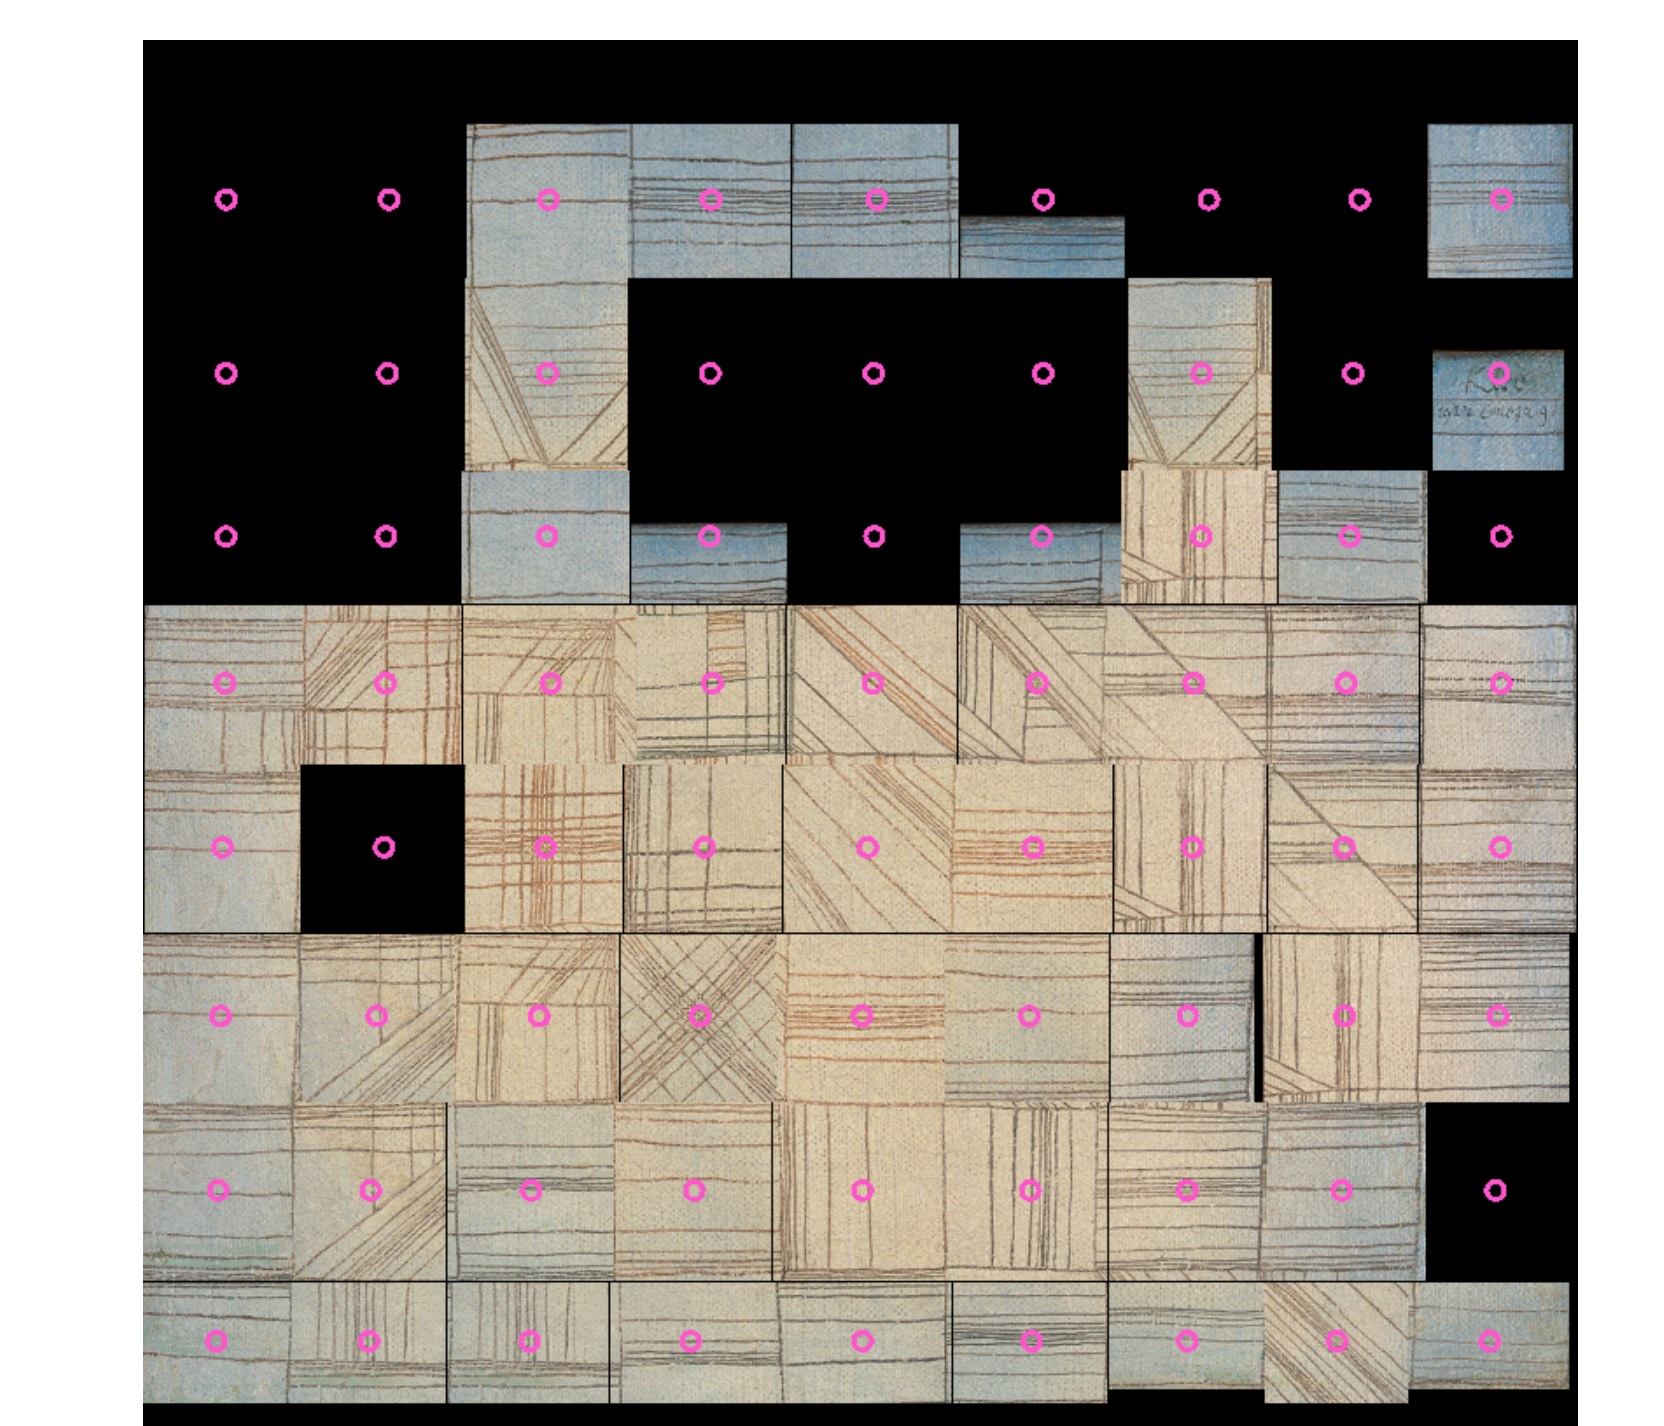
My next accident was that I discovered if I didn't move the masks when the pieces moved, then the whole thing wouldn't work. Here's a screenshot of version one.

Not what I planned, but sort of looks cool in an "I screwed up" sort of way? The pink circles represent the centers of each tile because of some previous issues.
The reason why this didn't work is because I switched the locations of the tiles, but didn't fix their masks! So the tiles are all on screen, but invisible because their masks are out of bounds. It took me a while to figure that out.
But, the final happy accident is how cool the tiles look when they switch. I'm pretty over the moon about that. All I'm doing is animating the tiles into position, but it looks cool because the masks are set first.
As far as interaction goes, I'm taking the standard tracking location that I always use and mapping it into a row/column index pair instead. Then the tiles follow that around and swap as they pass over another tile. When the tracking location goes out of bounds, then the whole grid "relaxes" and the tiles go back to their home indices.
    /**
     * Figures out which rectangle the tracking location is over, then runs
     *  a swap if necessary
     */
    function updateTrackIndex() {
        // if the tracking location is offscreen, send the grid back to normal
        if (trackLoc.y < slidingTileStart * scale ||
            trackLoc.y > slidingTileEnd * scale) {
            trackIndex = {row: -1, column: -1};
            if (frame % 2 == 0) {
                // give the sprites a little time to go home
                relaxGrid();
            }
        }

        var row, column;

        for (var j = 7; j >= 0; j--) {
            if (trackLoc.y > scaledTileMasks[j][0].y) {
                row = j;
                break;
            }
        }

        if (row == null) return;

        for (var i = 8; i >= 0; i--) {
            if (trackLoc.x > scaledTileMasks[row][i].x) {
                column = i;
                break;
            }
        }

        if (row != trackIndex.row || column != trackIndex.column) {
            var newIndex = {row:row, column:column};
            if (trackIndex.row >= 0 && trackIndex.column >= 0) {
                // Only swap if the tracking index is in bounds
                doSwap(trackIndex, newIndex);
            }
            trackIndex = newIndex;
        }

    }
Well, that's that!