

Garden Timelapse Movie: In Progress
This year I wanted to document the way our garden grows from the spring to the fall. I figured the best way to do that would be to take a picture from the same spot every day and then zip them up into a movie. I thought it would be pretty easy - just use a Python script to make an XML file for MLT Framework to zip up into a movie. I'm using MLT for another project, so I'm fairly familiar with it now. It uses FFMPEG as well as a few other libraries to let you do things a lot fancier with creating movies than just FFMPEG alone, such as adding filters and whatnot.
That would have worked perfectly well if I was organized enough to own a tripod for my phone and to always make sure I was taking the picture of my garden right at noon, but I'm not. Sooooo.... Photoshop to the rescue! I really love using it for video editing because I can't afford AfterEffects or anything, and usually all I have to make are slideshows or edit footage of my programs. For those kind of projects, it's perfect. At first I tried to do this the hard way, and it was slow and stupid. After some googling, I found a few resources that really helped.
One of the most important things about creating the timelapse video is to make sure the frames line up fairly well, otherwise it will make people dizzy. Luckily, Photoshop is awesome at doing this for you! If you just follow some simple instructions, you can wind up with an amazing time-lapse video without the tripod.
-
Take your pictures - pick an approximate time of day and a landmark. I picked lunchtime-ish and stood on an exposed pipe next to a bush in my backyard. I'm really scientific. Try to make sure they're all taken with the same camera/phone.
-
Upload the files - I use FileManager on my Droid's FTP function to transfer the pictures over.
-
Resize and rename them - The first time I did this, the photos were huge - 5300px across. With like 100 photos, the Photoshop document's size would get way out of hand. I planned to make a 1080p video, so I scaled them down about 50%. Don't scale them all the way down to 1920x1080 because you'll need wiggle room to make sure they all line up. Use Bridge and batch-resize and then rename them if you're particular about that kind of thing.
-
Make an Image Stack. Go to File->Scripts->Load Files into Stack...
-
Select the files you want and "Attempt to Automatically Align Source Images." Do not create a smart object because that merges all the images. I know because I did that. :-/
-
Wait a long time. On my computer, I didn't think this was going to work because I loaded 50 images and it froze up. However, eventually it pulled through! I was excited to see how the images aligned.
My garden frames after Photoshop nicely aligned them for me.
-
Change the canvas size to the desired size of your video - I used 1920x1080. Scale all of your layers down until they fit in the box and you're happy with them.
-
Create a frame animation by finding the Timeline window and then pressing the "Create Timeline Animation" button. (source).
-
Select all the frames, click on the menu icon on the timeline window, and select "Make frames from layers."
-
You may need to reverse the frames. Mine were in reverse chronological order, which is definitely not what I wanted. If you need to do that, select all the frames, click on the timeline window menu, and then click "reverse frames."

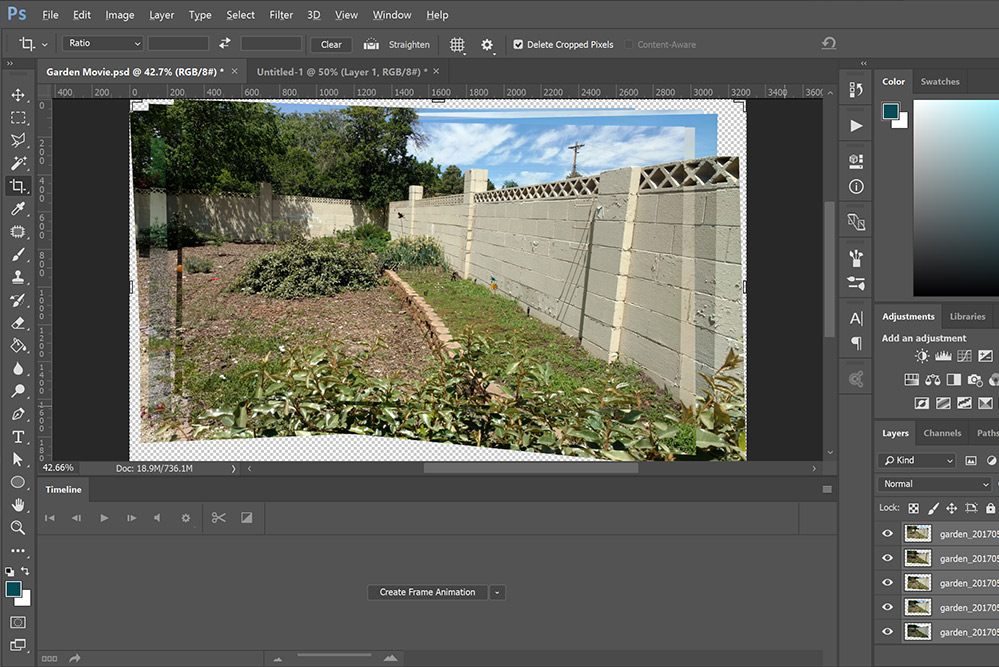
My garden movie after it had been cropped.
-
There you have it! Now you can export your video either as a video or a gif.
-
If you don't wait until you have all the frames, you may have to do this multiple times for each group. When you do, you can duplicate all of the layers from one stack into another document. Select all of your new layers and group them. Then select all of the old layers and group those as well. Make the top group semitransparent, and align them as best as you can visually.
Now I'm not going to show my video yet because I'm not done with it. You can expect it in October or November, because it's going to take a while to process all the frames. That's why I decided to get a jump on it now while I only have about 50.